Moving house is no easy feat! We all know that it ranks as one of the most stressful life events, on a par with job loss , divorce and bereavement. If you think for a minute about everything that goes into moving house you can quite quickly become overwhelmed and break out into a mild sweat… wait… what is that smell? {wink}
We make it our mission to take as much of that stress off you as possible. We consider ourselves experts in the field, so you can rely on us to help you with every step of the way – even if it is only advice you are after!
It has to be said that cleaning is the worst part of moving house {or office}, and not only do you have to do it.. you have to, in most cases, do it TWICE: Clean up the house you are moving out of, and the house you are moving in to! But this experience does not have to be as awful as you imagine – turn it on it’s head, and make cleaning a more enjoyable experience. You may be shaking your head at this {absurd} thought… but we assure you it can be done! With the help of these innovative cleaning and household tips:
Enjoy!
And let us know how you go
BetterMoves Team
PS. Follow us on Pinterest and Facebook to learn more tips and tricks
The Worst Cleaning Jobs Made Easy
Dirty Job No. 1: Clearing Dead Bugs From an Overhead Fixture
Time it takes: 15 minutes.
Why it matters: The corpses pile up, especially in summer. They’re not dangerous to your health, but who wants to look at them?

Step 1: Turn off the light and tape down the switch for safety. Wear an apron with pockets to stash supplies. With a screwdriver and a cotton cloth in your pocket, climb an extra-tall stepladder, which will get you eye to eye with the fixture. Unscrew the dome. Dust the bulb with the cloth.
Step 2: Climb back down and head to the kitchen. Dump any dead bugs into the trash. Line the sink with a large dish towel (to prevent breakage) and place the dome on top, open-side up. Fill with warm water and a squirt of dish soap and let soak.
Step 3: Wipe with a sponge, rinse, and dry. (You can also pop most domes into the dishwasher, says Henning, who does this with all but painted and very delicate covers.)
Step 4: When it’s dry, reattach the dome. (Consider switching to frosted-glass domes, which camouflage the body count better than clear ones.)
Try to do this: Whenever you’re sick of looking at the bugs… and before you move into or out of a home.
Dirty Job No. 2: Decrumbing the Toaster
Time it takes: 5 to 10 minutes.
Why it matters: Besides being a mess, the crumbs can smoke, stinking up your kitchen and possibly setting off your smoke alarm.
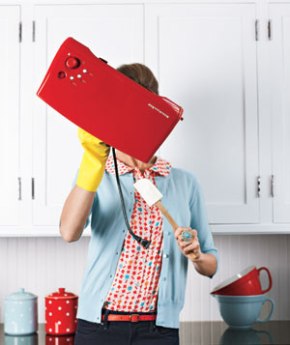
For a toaster
Step 1: Unplug and remove the crumb tray. Dump out the crumbs, then wash the tray with dish soap and wipe dry with a cotton cloth. Hold the toaster upside down over the trash can and gently tap out any remaining crumbs.
Try to do this: Every other month, and most especially before moving and packing it into a box!
Dirty Job No. 3: Cleaning Ceiling-Fan Blades
Time it takes: 15 minutes.
Why it matters: When dust sits around, dust mites move in. They contribute to allergies and sinus infections. A dusty fan can send mites scattering to bedding and furniture, so it’s actually a health risk.
Step 1: Tape down the fan’s switch for safety.
Step 2: Place an old pillow case cover over a blade
Step 3: Pull the fabric back, keeping all the dust and dirt contained
Step 4: Repeat for all blades
Try to do this: At the beginning and the end of fan season, or every other month if you use the fan year-round.
Dirty Job No. 4: Cleaning Heat and Air-Conditioning Vents and Radiators
Time it takes: 15 minutes per unit.
Why it matters: A buildup of dust anywhere harbors allergens. And when you’re dealing with vents and radiators, this dust is propelled into the room. Also, excessive dust makes your cooling and heating system work harder and therefore costs you money.
For vents
Step 1: Turn off the heat or the air-conditioning. Run the crevice tool of a vacuum over floor and baseboard vents. For ceiling vents, spread a sheet below and wear a baseball cap to shield your hair and eyes.
Step 2: Remove the vent covers (all you need is a screwdriver); you’ll have to use a stepladder for ceiling vents. Wash covers with dish soap, using a small sponge paintbrush to get into slats (plastic and unpainted aluminum or steel can go in the dishwasher). If you want to soak the covers to get them extra clean, use only hot water—prolonged exposure to soap may take the paint off. Clean inside ducts, as far as you can reach, with the crevice tool or a cobweb duster, which has stiff bristles and a rounded head that fits inside ducts. When they’re dry, replace the covers.
Try to do this: Twice a year and when moving.
Special thanks to Real Simple for these great tips!


 Invites can be quick and easy, and pretty darn cheap too!


 By: Tom Corliss – webmaster @ Home Information Guru.com


